College apartments need security that is cheap, removable, and easy for multiple people to use. The best setup protects the front door, packages, bikes, parking areas, and ground-floor windows without turning the apartment into a surveillance problem.
Quick verdict
The best security system for a college apartment is a no-contract DIY kit with adhesive entry sensors, a loud siren, separate roommate codes, optional exterior-facing cameras, and self-monitoring or low-cost monthly monitoring.
What to cover first
- Main entry: add a door sensor and a keypad or app access for each roommate.
- Ground-floor windows: prioritize windows that are easy to reach from outside.
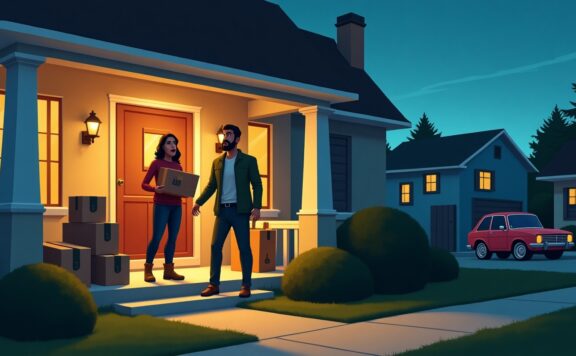
- Packages: use a video doorbell or exterior-facing camera where building rules allow it.
- Bikes and storage: cover garages, storage cages, or shared bike areas with exterior cameras or motion alerts.
- Parking: if allowed, watch assigned parking or shared driveways from outside-facing cameras.
Privacy rules
Never install cameras in bedrooms, bathrooms, or private roommate areas. For shared spaces, get agreement first. Exterior-first camera placement is usually the cleanest option for college housing.
Access-control checklist
- Give every roommate a unique code.
- Use temporary codes for visitors or pet sitters.
- Remove access when someone moves out.
- Limit admin rights to one or two people.
- Do not reuse one simple code for everyone.
Budget monitoring
Self-monitoring is often enough for small apartments, but professional monitoring can make sense for ground-floor units, frequent travel, or buildings with repeated break-ins. Compare cloud video, cellular backup, and dispatch costs separately.
Bottom line
For college apartments, keep the setup simple: door sensors, roommate codes, privacy-safe cameras, and no long contract. Spend on coverage first, then add monitoring only if the risk justifies it.
Related guides
- Best security systems for roommates
- Best no-contract home security systems
- Best smart locks for renters
- Security camera privacy guide
College Apartment Security Checklist for 2026
College apartments need security that works with roommates, leases, and frequent visitors. The best setup is removable, easy to share, and clear about who can access the home.
- Choose renter-friendly gear: prioritize peel-and-stick sensors, plug-in cameras, and devices that do not require permanent wiring.
- Use separate access codes: give roommates, trusted friends, and maintenance contacts unique codes instead of sharing one PIN.
- Cover shared entries first: focus on the front door, balcony door, ground-floor windows, and any entry near parking.
- Keep cameras out of private spaces: use cameras only in agreed common areas or at exterior-facing entries where allowed.
- Plan move-out cleanup: remove users, reset codes, and take sensors down without damaging walls or trim.
The right college apartment system lowers risk without creating roommate friction or lease problems.
June 2026 internal-linking update: student apartments, HomeKit, and no-subscription paths
College apartment security now splits into three common buying paths: a basic sensor-first kit, a HomeKit-friendly setup, or a no-subscription system for students who want lower monthly cost. Start with the entry layer, then add cameras and smart-home features only where roommates and lease rules allow them.
- Sensor-first: door, window, and patio alerts matter more than extra cameras.
- HomeKit path: use automation carefully so roommates understand who receives alerts.
- No-subscription path: confirm which alerts, clips, and backup features still work without a paid plan.
Related guides: HomeKit security systems for college apartments, no-subscription security systems for college apartments, smart home security systems for renters, and security systems without Wi-Fi. Abode buyers should compare the Smart Security Kit and Abode plans before deciding whether monitoring is worth the cost.
Semester-change access and device audit
A college-apartment system should be reviewed whenever a roommate, lease, class schedule, internet provider, or household device changes. Do not wait until move-out to discover that a former roommate can still view a camera, disarm the alarm, or unlock a door.
Before a new semester
- Recheck the property: compare doors, windows, balcony access, packages, lighting, and parking against the first-apartment security setup checklist.
- Audit members: list every alarm user, app member, lock code, camera viewer, voice-assistant household, monitoring contact, and recovery email.
- Retest coverage: open each protected door and window, walk past each motion sensor, check siren audibility in bedrooms, and confirm the correct residents receive alerts.
- Test failures: disconnect internet briefly, restart the router, check hub backup power, and confirm every device returns online.
- Record the baseline: save device names, placement photos, battery dates, user roles, and the expected result of each test.
When a roommate or regular guest changes
Give each new resident a named account or code instead of sharing the owner login. Temporary visitors, pet sitters, cleaners, and maintenance workers should receive the narrowest access that does the job. The HomeKit guest-access checklist provides a useful code, schedule, and removal pattern even when the apartment uses another platform.
When someone leaves, remove them from the alarm, cameras, locks, home-control app, voice assistant, monitoring contacts, and account-recovery options. Then test the old account and code. Use the member-removal checklist to catch access that survives in a linked service.
After an app, router, hub, or automation change
Change one layer at a time. Save the current device and user list, apply the update, test the alarm independently, and keep a reversal step. The smart-home security update and rollback checklist covers staged changes, outage tests, account recovery, and restoration records.
Five-minute acceptance test
- Arm the system and open the main door.
- Confirm entry delay, keypad, local siren, phone alerts, and monitoring response.
- Confirm indoor cameras respect the household’s agreed privacy state.
- Confirm every current resident can enter and every former code fails.
- Sign and date the test in a shared household record.
This audit turns roommate turnover into a controlled access change instead of a full-system reset. It also creates a clean record for the next semester, maintenance visit, or move.
Turn the college-apartment shortlist into a roommate control plan
A college-apartment system is not ready just because every sensor appears in an app. Shared leases create three separate jobs: detecting entry, routing the right alert, and removing access when a roommate, subtenant, partner, cleaner, or guest leaves. Write those jobs down before buying hardware. The record should name the lease holder, system owner, billing owner, backup administrator, monitoring contact, camera viewer, lock-code manager, and the person allowed to reset equipment.
Keep that record outside the security app. A shared note that every resident can edit is not a recovery plan. Store the vendor name, account email, recovery method, device list, room names, emergency contacts, landlord approvals, receipts, and move-out date. Use the passkey and security-key readiness audit to test recovery without handing one resident permanent access to another person’s email or phone.
Separate shared access from account ownership
Give each resident an individual member profile when the product supports it. Do not share the owner password, recovery email, or a single permanent door code. Individual identities make it possible to remove one person without breaking alerts for everyone else. They also show which permissions are actually available: arming, disarming, live video, recordings, lock control, automation editing, billing, support, and device removal are different rights.
If the system only supports one account, treat that as a buying constraint. Decide who will own the account through the full lease, how the other residents receive alerts, and how the account will be transferred or closed. Run the backup-administrator drill before relying on a single student’s phone during travel, exams, illness, or a device loss.
Build a room-by-room privacy map
Mark the front door, balcony or patio door, accessible windows, shared hall, utility space, and any private bedroom. Door and window sensors usually answer an opening question without recording people. Cameras create a larger privacy and evidence job. Keep indoor cameras out of bedrooms and bathrooms. For shared living areas, document the field of view, microphone state, viewers, recording rules, retention, exports, and what happens when a resident withdraws consent.
Test whether a camera aimed at the entry also captures a neighbor’s door, a shared corridor, a desk, or private conversations. The alert-fatigue checklist helps assign urgent entry alerts, lower-priority device warnings, and quiet-hour rules without muting the whole system.
Prove alerts on the network students actually use
Do not assume building Wi-Fi behaves like a private home router. Campus-adjacent apartments may use managed Wi-Fi, client isolation, captive portals, shared credentials, or landlord-controlled equipment. Confirm whether the hub needs Ethernet, whether 2.4 GHz is available, whether cameras can reconnect after a password change, and who can reach the router during an outage.
Run the alert-delay test on apartment Wi-Fi, mobile data, and a second resident’s phone. Record the time from opening a door to local sound, push alert, text, call, recording, and any monitoring event. A tile changing state inside the apartment is not proof that a resident across town will receive and act on the alert.
Plan lock access without creating a lockout
A smart lock must fit the exact door, lease, fire-safety rules, cylinder, deadbolt, and building policy. Keep the approved mechanical path and landlord access available. Issue named or scheduled codes where supported, remove expired codes, and test the door from both sides. Never let a motion event or a broad presence routine silently unlock the entry.
Low battery is predictable. Use the smart-lock emergency-power test to identify the real backup path for the exact model. Confirm who carries a key, where spare batteries or emergency power are available, and how a resident gets in when the phone, internet, bridge, or lock battery is unavailable.
Set an incident and account-recovery order
If a phone, credential, code, or shared account may be compromised, preserve needed evidence before resetting devices. Remove unknown sessions, rotate exposed credentials, revoke codes, check camera viewers, inspect automation changes, confirm monitoring contacts, and retest every route. The account-compromise response checklist keeps the order clear so one rushed reset does not erase useful history or strand the other residents.
Keep local emergency numbers and the property manager’s contact in the written plan. Residents should know which events require emergency services, which require the landlord, and which are ordinary maintenance. An alert without an agreed responder can produce more confusion than protection.
Run a 75-minute college-apartment acceptance test
- Minutes 0–10: verify the inventory, landlord approval, owner account, individual members, recovery method, and backup administrator.
- Minutes 10–25: open each protected door and window. Confirm zone names, local sound, entry delay, and the intended resident alerts.
- Minutes 25–35: test every lock code, key, emergency-power path, auto-lock rule, and access-removal step.
- Minutes 35–50: test cameras only in approved areas. Check field of view, microphone state, viewers, recording, playback, retention, and one evidence export.
- Minutes 50–60: disconnect internet service. Record which local detection, siren, lock, camera, hub, and monitoring functions continue.
- Minutes 60–70: restore service and restart one phone. Confirm alerts resume without duplicate devices, missing residents, or abandoned sessions.
- Minutes 70–75: simulate a roommate departure. Remove one test member and code, then prove that the remaining residents still have the right access.
Do not call the college-apartment setup ready until these blockers are cleared
- The landlord or lease does not permit the planned lock, camera, wiring, drilling, or adhesive placement.
- Residents must share an owner password, recovery email, or permanent door code.
- A private bedroom, bathroom, neighbor’s door, or shared corridor is recorded without a documented lawful basis and resident agreement.
- The system cannot reconnect on the building network or no resident can reach the router during an outage.
- Local sound, remote alerts, recordings, monitoring, or the backup entry path were assumed rather than tested.
- No one is assigned to low-battery warnings, subscription failures, device faults, emergency contacts, or evidence requests.
- There is no dated move-out process for accounts, members, codes, recordings, hardware, billing, and landlord handover.
Write the move-out plan before move-in
At turnover, export only the evidence residents are entitled to keep, remove departing members and codes, transfer or close billing, delete unneeded recordings, factory-reset owner devices, restore approved door hardware, patch permitted mounting points, and photograph the final condition. Follow the renter move-out checklist even when the system is not Apple Home based; its account, access, device, and handover sequence applies to most shared apartments.
Add recurring maintenance to the same record. The battery-maintenance guide covers sensors, hubs, cameras, low-battery warnings, spares, and post-replacement tests. A small dated routine is safer than discovering a dead sensor during an actual event.