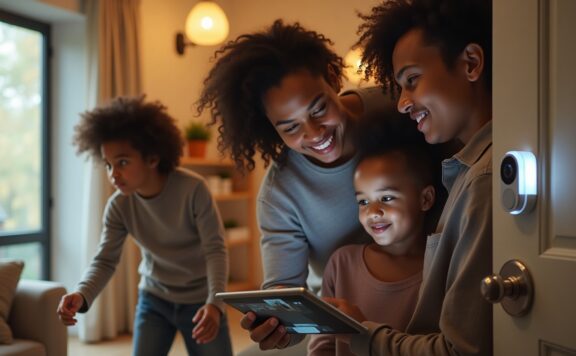
HomeKit can work well for pet owners because it is good at routines: lights, cameras, locks, and notifications can change based on whether someone is home. The risk is over-automating motion alerts and turning normal pet movement into noise.
Source check: Apple explains HomeKit Secure Video requirements on Apple Support. Abode product links checked: Abode Smart Security Kit, Mini Door/Window Sensor, Abode Cam 2, Abode Lock, and Abode plans.
Best HomeKit setup for pet owners
| Need | HomeKit role | Security rule |
|---|---|---|
| Intrusion alerts | Use sensors as the trigger | Do not rely on indoor pet motion as the alarm source. |
| Pet check-ins | Use a camera view | Keep camera zones away from constant pet paths if alerts are noisy. |
| Walker or sitter entry | Use lock codes | A code is cleaner than broad Home app access. |
| Night routines | Lock, lights, and arm state | Keep routines simple enough that pets do not accidentally trigger them. |
Where Abode fits
The Abode Smart Security Kit gives the security base. Add Mini Door/Window Sensors for entry status, use Abode Cam 2 for check-ins, and use the Abode Lock for sitter codes.
Compare Abode plans if pets spend long periods home alone or if nobody can respond quickly to app alerts.
Related guides
Next reads: smart home security systems for pet owners, smart home routines for pet owners, home security systems for pet owners, and smart locks for caregivers.
Run HomeKit security around real pet routines
A pet-friendly setup needs more than fewer motion alerts. It needs clear ownership for entry sensors, indoor cameras, sitter access, alarm modes, and failure recovery. Use the links below to turn the shopping list into an operating plan.
| Pet-owner job | Safer rule | Detailed guide |
|---|---|---|
| Stop routine pet movement becoming an intrusion alert | Use door and window contacts as the primary perimeter; tune indoor motion only after a real walk test. | False-alarm reduction checklist |
| Give a walker, sitter, cleaner, or carer access | Create a named temporary code, set an expiry, and remove it after the last visit instead of sharing the owner account. | Smart-lock access-code audit |
| Protect privacy during indoor check-ins | Aim cameras only at the pet area or entry route, document who can view footage, and use a visible privacy routine when people are home. | Security-camera privacy guide |
| Keep alerts useful when pets stay home alone | Assign each alert a named responder and an escalation step. Do not make a distant owner the only response path. | HomeKit notification audit |
| Set bedtime without trapping a late pet sitter outside | Define which perimeter sensors arm, which route remains usable, and how Night mode returns to the normal morning state. | HomeKit night-mode checklist |
| Recover after an internet or phone failure | Test local siren, keypad, lock, camera recording, alerts, and owner access as separate functions. | Security without internet and phone replacement checklist |
Pet-sitter handover checklist
- Create a named code with the narrowest useful schedule; do not reuse a family PIN.
- Show the sitter the approved door, lock, alarm mode, keypad, pet route, and emergency contact.
- Explain which camera views exist and when indoor privacy mode should be active.
- Run one arrival and departure while the owner watches the alert, lock, sensor, and arm-state sequence.
- Test what the sitter should do if the app, internet, lock, or keypad is unavailable.
- Remove the code and any shared app access after the final visit, then confirm old access fails.
Ten-minute pet-owner acceptance test
- Arm the normal pet-alone mode and let the pet follow its usual route. Record false motion, camera, and sound alerts.
- Open each protected exterior door and window. Confirm the correct sensor name, local warning, phone alert, and response owner.
- Enter with a temporary sitter code, disarm through the approved path, and verify the event history names the right person or code.
- Test the indoor camera’s live view, privacy control, notification delay, night image, and one clip export.
- Disconnect the internet, then repeat the local alarm, keypad, lock, and recording checks that should remain available.
- Replace or sign out the owner’s phone and confirm a documented recovery path restores access without leaving an old session active.
- Remove the sitter code and prove it no longer unlocks or disarms.
If the setup fails any test, fix the rule, placement, access, or response owner before the return window closes. For an Abode-based layout, compare the current Smart Security Kit and plan options, then verify exact HomeKit behavior, camera features, and service terms for the chosen devices.
Use seven operating guides before approving a HomeKit pet-owner setup
A HomeKit label does not answer the pet-owner questions that determine whether a system works. Buyers still need to prove which animal movements create alerts, which doors and windows matter, who can enter while the household is away, what cameras record, which paths survive without a paid plan, and who acts when the owner cannot answer.
Use the seven guides below as separate decision routes. Open only the routes that match the home’s real jobs, but score every required route before buying. A camera route cannot make up for an unprotected door, and a reliable sensor cannot fix a sitter-access or privacy failure.
| Pet-owner job | Use this guide | What it must prove |
|---|---|---|
| Camera alerts without a permanent camera plan | No-subscription cameras for pet owners | Wanted alerts, local evidence, playback, export, privacy, and outage behavior |
| Entry detection around animals | HomeKit door sensors for pet owners | Door state, mounting, false alerts, battery warnings, and hub reach |
| Permanent plan-free operation | No-subscription systems for pet owners | What remains after a trial, local response, evidence, users, and recovery |
| Ring or SimpliSafe alternative | Ring vs SimpliSafe for pet owners | Equal zones, camera evidence, alarm response, pet motion, and 36-month cost |
| Camera motion boundaries | HomeKit camera activity-zone audit | Included and excluded motion, alert rate, recording, and privacy boundaries |
| Sitter and temporary access | HomeKit house-sitter access checklist | Named access, start and end times, locks, cameras, removal, and fallback |
| Alert delivery to the right person | HomeKit notification reliability checklist | Recipients, Focus modes, phones, hubs, networks, delays, and escalation |
Start with the animal and property map
Write down each pet’s species, size, normal routes, sleep areas, feeding areas, door habits, escape risk, sitter needs, and any medical or behavioral limit that affects alarms or access. Do not put sensitive details into a broadly shared app note. Keep only what the system owner and approved caregiver need for safe operation.
Map every exterior door, pet door, accessible window, garage connection, gate, package area, camera view, lock, alarm zone, Home hub, router, and weak-signal area. Mark which spaces pets can enter when the home is occupied, empty, sleeping, or under sitter care. A motion sensor that works in a closed test room may fail as a system choice when a cat reaches shelves or a dog uses a hallway all night.
Give each mapped point one primary job. A door sensor proves open or closed state. A camera supplies visual context or evidence. A lock controls access. An alarm system handles detection and response according to its exact configuration. An automation changes behavior under a rule. Avoid claiming that one device covers every job because it appears in Apple Home.
Separate pet movement from intrusion evidence
Test real animal movement before relying on “pet friendly,” “person detection,” an activity zone, or a motion-sensitivity slider. Run ordinary routes, jumping, climbing, feeding, zooming, resting near a warm vent, passing curtains, shadows, headlights, insects, and a sitter entering with the pet nearby. Record wanted alerts, unwanted alerts, missed events, and time to notification.
For entry points, use direct door and window state where possible. A camera classification can add context, but it should not be the only proof that a required door opened unless the household has consciously accepted that limit. Use the HomeKit door-sensor route to test alignment, adhesive or screw mounting, vibration, tamper visibility, hub range, low-battery warning, and recovery after a hub or network interruption.
For cameras, run the activity-zone route with the final mount, lens angle, day and night lighting, normal furniture, and every pet in its normal areas. Draw included and excluded zones from observed events. Activity zones can change which motion creates an event; do not treat them as proof that pixels outside the zone are hidden from live view or recordings.
Choose recording and storage from the response job
Decide why video is needed. Common jobs include checking whether a pet escaped, confirming a sitter arrived, understanding a false alarm, reviewing a package interaction, or showing what happened before an entry alert. For each job, define the needed view, clip start, duration, audio, timestamp, retention, playback, download, and sharing.
If permanent no-subscription operation is required, use both no-subscription routes. One focuses on pet-owner camera behavior; the other tests the broader system state after a trial or plan ends. Confirm live view, event alerts, recording, storage, playback, export, named users, automations, outage behavior, and recovery on the exact hardware. “Subscription optional” is not enough.
Export one useful day clip and one useful night clip. Open each outside the camera app on a signed-out device. Confirm time, camera identity, useful detail, audio state, and whether the file can be shared without granting ongoing account access. If the clip exists only in the app or disappears with the plan, record that dependency in the 36-month decision.
Build sitter access as a temporary operating state
A pet sitter needs enough access to enter, care for the animal, handle routine alarms, and leave safely. They do not automatically need every camera, recording, automation, lock, alarm, resident, billing, or administrator permission. Use a named account or code with a documented start, end, owner, and removal test.
The house-sitter route should prove entry at the intended door, lock or code behavior, alarm disarm and re-arm if required, camera privacy, alert recipients, pet-door rules, emergency contacts, physical key fallback, and removal after the last visit. Test once while the owner is available. Do not make the first live use a late-night visit or a travel-day handoff.
After removal, confirm the old account, code, phone, or invitation cannot unlock, view cameras, receive alerts, change modes, or open history. Check each platform involved; removing someone from Apple Home does not prove that a manufacturer app, lock app, alarm account, or camera account removed them too.
Route alerts to people who can act
List every alert and one owner: exterior door left open, pet door used, motion in a restricted room, camera person event, alarm state change, low battery, device offline, internet loss, power loss, sitter arrival, and plan or storage failure. The notification-reliability route should test which device receives each alert and what happens if the primary person is unavailable.
| Alert | Primary recipient | Backup | Action | Time limit |
|---|---|---|---|---|
| Pet-risk door opens | Named resident | Local contact | Check state, camera context, and safe response | Household limit |
| Pet-area camera person event | Named resident | Sitter if on shift | Review event without exposing unrelated rooms | Household limit |
| Low battery or device offline | System owner | Maintenance owner | Replace, reconnect, and retest | Before coverage is relied on |
| Alarm event while sitter present | System owner | Monitoring or local contact if selected | Follow written verification and cancellation steps | Plan-specific |
Test locked phones, cellular data, Wi-Fi, Focus modes, low-power mode, Apple Watch if used, and a recipient outside the home. Do not average away a miss. A required alert that reaches one device quickly but misses the only person able to act is a failed route.
Compare Ring and SimpliSafe only on equal pet-owner jobs
The Ring versus SimpliSafe guide is useful when the shortlist has moved beyond HomeKit-only products. Build the same property and pet map for both. Price the same entry zones, pet movement areas, camera views, siren path, household response, any selected monitoring, storage, named users, outage behavior, and three-year ownership period.
Do not compare a camera-and-doorbell cart with a full alarm cart and call the cheaper price a winner. If a required sensor, camera, response path, or storage function is missing, mark it not provided or add the needed product. Record current checkout terms, renewal, cancellation, return window, and what happens when a plan ends.
Use the comparison as a boundary check, not as a reason to add a brand. The best fit is the system that passes the pet movement, entry, privacy, access, response, outage, and cost tests with fewer unresolved blockers.
Audit privacy by room and role
For each camera, record purpose, view, audio, activity zones, recording state, who can watch live, who can review recordings, who can download, retention, and the date access ends. Avoid pet-camera placement that captures bedrooms, bathrooms, private work, neighboring property, or more sitter activity than the security job requires.
Test privacy states while the home is occupied, away, sleeping, and under sitter care. Confirm that an automation does not silently change a camera or notification state at the wrong time. If a camera is disabled for privacy, decide what sensor or human-response path still covers the required entry job.
Check audio and two-way talk separately. A microphone can expose conversations even when the lens appears harmless. Tell approved caregivers what is recorded and when. Keep policy and consent requirements for the installation address in the decision record.
Test HomeKit and manufacturer-app boundaries
List every function in Apple Home and every function that remains in a manufacturer app. Test status, control, notifications, recordings, users, firmware, battery, device reset, and plan settings separately. A device appearing in Apple Home does not mean all features, history, storage, or account controls moved there.
Record the home hub used for remote access and automations, the camera or sensor bridge if any, router and Wi-Fi dependencies, and the recovery order after a restart. Test one hub restart, one router restart, one manufacturer-app sign-out, and one removed household member. The system should return to the documented state without hidden duplicate devices or lost access rules.
Score the seven decision routes
| Route | Weight | Observed result | Blocker? |
|---|---|---|---|
| Pet-safe entry detection | 20 | Pass / fail / not provided | Yes for a required door or window |
| Camera evidence and activity zones | 15 | Pass / fail / not provided | Yes when visual evidence is required |
| Permanent no-subscription state | 15 | Pass / fail / not provided | Yes when plan-free use is required |
| Sitter access and removal | 15 | Pass / fail / not provided | Yes when a caregiver needs entry |
| Notification delivery and response | 15 | Pass / fail / not provided | Yes for a required alert |
| Privacy and account boundaries | 10 | Pass / fail / not provided | Yes for unresolved access |
| Outage recovery and 36-month cost | 10 | Pass / fail / not provided | Household decision |
Score only observed behavior on the exact system. Do not give credit for a feature on another model, another plan, or a marketing page that the test cart does not include. A high total does not override a failed required row.
Run a 60-minute pet-owner decision-route review
- Minutes 0–8 — map: record pets, normal movement, doors, windows, pet doors, cameras, locks, hubs, sitters, and response owners.
- Minutes 8–16 — entry: use the HomeKit door-sensor route to test normal openings, pet movement, range, battery, and alert delivery.
- Minutes 16–26 — cameras: test day, night, pet, person, package, activity-zone, recording, playback, and export behavior.
- Minutes 26–34 — plan-ended state: record what remains without a paid camera or system plan and mark missing functions.
- Minutes 34–42 — sitter: create, use, and remove one temporary access path; verify lock, alarm, camera, and notification boundaries.
- Minutes 42–50 — notification: test the primary and backup recipient across Wi-Fi, cellular data, locked screen, and Focus mode.
- Minutes 50–56 — failure: test one hub, router, power, battery, account, or app failure and record recovery.
- Minutes 56–60 — closeout: score the seven routes, list blockers, assign owners, and reject any cart that leaves a required pet-safety or access job unresolved.
Do not approve the HomeKit pet-owner setup until these blockers are cleared
- A required pet-risk door, window, gate, or pet door has no direct tested state path.
- Normal pet movement creates an unmanageable alert rate or hides a wanted event.
- A camera activity zone or privacy state has not been tested in day and night conditions.
- The required recording, playback, export, or retention path disappears after a trial or plan ends.
- A sitter lacks safe entry or has more camera, account, alarm, or administrator access than needed.
- A removed sitter, resident, code, invitation, or old phone retains access in any platform.
- The primary alert recipient can miss a required event and no backup person owns the response.
- A HomeKit automation changes a lock, camera, alarm, or notification state without a tested fallback.
- The home hub, bridge, router, network, or power failure path has no accepted operating state.
- The comparison prices unlike property maps or hides standard renewal, storage, monitoring, or replacement costs.