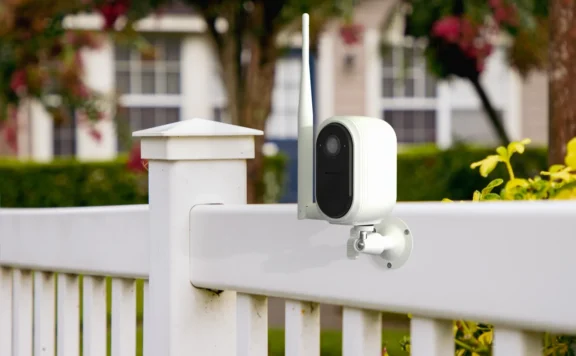
A no-subscription backyard security setup has to stay disciplined. Start with the entry points, add light where people move, then use cameras only where video solves a real job: package checks, side-gate activity, or patio-door verification.
Best No-Subscription Backyard Setup
| Layer | What It Covers | Subscription-Free Fit |
|---|---|---|
| Patio-door sensor | Sliding doors and back entries | Strong |
| Side-gate alert | Fence gates and side paths | Strong if sensor range works |
| Motion light | Night movement near paths | Strong |
| Camera | Packages, driveway edge, patio zone | Depends on storage and alert limits |
| Paid monitoring | Response when you are unavailable | Optional, but valuable for higher-risk homes |
Where Abode Fits
The Abode Smart Security Kit is a strong base because it can start with self-monitoring and still leave room to add paid services later. Use the Mini Door/Window Sensor on the patio door, then add Abode Cam 2 only where a camera has a clean view of your own property.
Before committing to no monthly cost, compare the free and paid options on Abode plans. The question is not whether a subscription is good or bad. The question is whether cellular backup, recording, or response coverage changes the risk picture.
Internal Planning Guides
Use the no-subscription patio-door guide for the first sensor layer. Then compare the backyard security routines guide and HomeKit backyard guide if the setup needs automations or Apple Home fit.
If the camera angle is tricky, check the security camera privacy guide before mounting anything near fences, shared paths, or neighbors.
July 2026 ownership check: what “no subscription” should cover
A no-subscription backyard setup should keep its basic local protection useful without a required monthly payment. Before buying, verify which alerts, live views, recordings, automations, shared users, and exports work on the free tier. Paid monitoring or cloud storage can still be optional upgrades.
| Backyard zone | Start with | Recurring-cost question | Failure test |
|---|---|---|---|
| Patio door | Named contact sensor | Are open/close alerts and history included? | Open it during an internet outage |
| Side gate | Gate sensor or narrow camera zone | Does useful detection require a paid tier? | Test wind, pets, and normal visitors |
| Shed | Door sensor, local alarm, or camera | Is local or removable storage supported? | Test weak Wi-Fi and lost power |
| Yard camera | Entrance-focused field of view | What recording, export, and retention stay free? | Miss an alert and recover the clip |
| Path lighting | Verified sensor or motion trigger | Will the routine run without cloud service? | Confirm manual control remains available |
Run a 30-day backyard test before adding services
- Week 1: tune sensor names, camera zones, and household alerts.
- Week 2: test night lighting, pets, deliveries, guests, and weather.
- Week 3: disconnect internet and power, then record what keeps working.
- Week 4: total storage, batteries, replacement parts, and any service you actually need.
Use the no-subscription cost guide for a three-year ownership check. The backyard routines guide, HomeKit backyard guide, and outdoor camera guide cover the next decisions. Compare the Abode Smart Security Kit and current plans when you want free self-monitoring with optional paid response or backup features.
August 2026 update: prove a no-subscription backyard setup still works
A backyard system is easy to overbuy and hard to verify. A camera may show a person after the fact but miss the gate opening. A contact sensor may report the gate correctly but leave no useful image. A local recorder may keep clips without a fee but become unreachable after a router change. Treat “no subscription” as an operating requirement, not a product label.
Write down the jobs first: detect the gate, detect the patio door, watch the approach, protect the shed, preserve useful evidence, notify the right person, and keep a path to operate during internet or power loss. Then assign one device and one owner to each job. This stops a camera-heavy shopping list from hiding an unprotected gate or door.
Build a one-page backyard operating record
Record the exact device model, location, connection path, power source, storage location, app owner, recovery method, and last successful test. Add a row for every gate, door, camera, siren, light, hub, recorder, and backup-power device. If a feature changes when a trial or service ends, record both the free-state behavior and the paid-state behavior.
- Boundary: Which gate, fence opening, patio door, shed door, or side passage is covered?
- Signal: Is the event based on direct open/closed state, motion, person detection, sound, or a combination?
- Evidence: Where is the clip stored, how long is it retained, and who can export it?
- Notification: Which phones receive the alert and what happens if the first person does not respond?
- Failure state: What remains after internet loss, power loss, a full storage card, a dead battery, or an ended service?
Use the broader no-subscription ownership-cost guide to capture replacements, storage media, backup power, and optional service without mixing them into one headline price.
Use direct state for gates and doors
A gate contact or door sensor answers a different question from a camera. Direct state can tell you that the gate opened even if a person stayed outside the camera frame. Before mounting anything permanently, test the real gap between the sensor halves, gate movement in wind, rain exposure, metal interference, and radio range with the gate fully open and closed.
For a patio door, verify the sensor does not interfere with the lock, track, screen, or daily use. The no-subscription patio-door guide covers direct entry detection and camera placement as separate jobs.
Make the camera prove useful evidence
Walk the real approach in daylight, at dusk, and after dark. Check whether the face is large enough to identify, whether a hood or backlight defeats the image, and whether the person leaves the frame before the clip starts. Trigger several events close together to reveal cooldown or recording gaps. Export one clip to a second device and open it without the camera app.
Do not point a camera farther than the security job requires. Review neighboring windows, shared fences, sidewalks, audio capture, guest areas, and household expectations. The camera privacy guide provides a practical field-of-view and access review.
Prove storage health instead of assuming it
Local storage is not the same as verified storage. Confirm the card, hub, or recorder is detected; record until older footage is overwritten; remove power once; reconnect the network once; and export a recent clip. Note any health warning the app provides and schedule a monthly check. If storage silently fails, the system can look normal until evidence is needed.
Keep the export in a location separate from the camera or recorder. A stolen camera, damaged shed, or failed card should not erase the only copy of an important event.
Separate local alerts from remote alerts
A siren, chime, or local automation may work while the internet is down, but remote push alerts usually require a working path through the vendor service. Test both. Turn off the home internet without turning off local power, trigger each boundary, and record which local actions continue. Restore internet and time how long remote alerts and live view take to recover.
If a light is part of the response, keep the automation narrow: one verified event, a short duration, and an easy manual override. See the backyard security-routines guide for bounded lighting and notification patterns.
Test power loss at the device and network layers
Unplug the outdoor camera or recorder, then unplug the router while leaving devices powered. These are different failures. Record whether the sensor still reports locally, whether the camera records locally, whether a hub sounds, and whether clips appear after recovery. If a battery device enters a low-power mode, repeat the test at a realistic battery level.
Label power adapters and backup outlets. A family member should be able to identify the router, hub, recorder, and critical camera without guessing. Record the safe restart order so a rushed reset does not remove a device or erase storage.
Control accounts, guests, and recovery
The owner account should not be the only path to the system. Add a second authorized adult, use unique accounts where supported, and verify that guest access cannot change storage, privacy, or billing settings. Store recovery codes outside the app and document who can remove a former household member or contractor.
For Apple households, the HomeKit backyard guide explains home-hub ownership and Apple Home access. Still test the vendor app separately because camera storage, firmware, and recovery may live outside Apple Home.
Use a matched three-year ownership sheet
Compare systems at equal coverage: the same gates, doors, cameras, storage target, backup-power target, and alert path. Include replacement batteries, storage cards or drives, mounts, weather protection, network extensions, backup power, and any optional service you genuinely expect to use. Mark every estimate and keep current vendor terms beside the sheet.
Do not count a temporary trial as permanent free functionality. Run the setup once while the trial is active and again after it ends. If a required job disappears, either budget the service or redesign the job before the return window closes.
60-minute no-subscription backyard acceptance test
- Minutes 0–10: Walk every gate, patio door, shed door, and camera approach. Confirm direct state, event labels, and the intended field of view.
- Minutes 10–20: Trigger daylight and low-light camera events, including two events close together. Check start time, subject size, and recording gaps.
- Minutes 20–30: Open the alert on two authorized phones. Export one clip and play it outside the camera app.
- Minutes 30–40: Disable internet but keep local power. Repeat one gate, one door, and one camera event; record local and remote behavior.
- Minutes 40–50: Restore internet, verify recovery, inspect storage health, and confirm recent events remain available.
- Minutes 50–60: Review privacy, guest access, recovery records, battery dates, and the next test owner. Fix any failed job before adding equipment.
When an optional service is worth adding
Add a service only when it solves a named gap, such as remote recording, longer evidence retention, person filtering, or professional response. Verify the exact plan and product combination on the current vendor page. For an example of a system that supports a self-managed starting point plus optional plans, review the current Abode plan page and confirm the features you need before purchase.
The right no-subscription setup is not the one with the longest feature list. It is the one that proves each required backyard job, exposes its failure states, and leaves a written recovery path.
Bottom Line
No-subscription backyard security works best when it is sensor-first and camera-light. Build around doors, gates, and lighting first. Add recording or monitoring only when the home has a real response gap.
FAQ
Can a backyard security setup work without a subscription?
Yes, if the core job is local alerts from patio doors, side gates, lights, and cameras. Paid plans matter more when you want cloud recording, cellular backup, or professional monitoring.
What should I secure first in a backyard?
Start with patio doors and side gates. They create clearer signals than camera motion alone and make the rest of the setup easier to tune.
When is a paid plan worth adding?
Add a paid plan when missed events, cellular backup, longer video history, or professional response would materially reduce risk for the home.