A side door often carries more daily traffic than the front entry. Children, pets, bins, contractors, garage trips, and deliveries can turn one quiet opening into the hardest door to manage. A useful Apple Home setup starts with the door itself: confirm that it closes cleanly, detect whether it is open, control who can unlock it, and decide who responds to an alert.
This guide treats HomeKit as the household control layer, not as a substitute for an alarm. Product support, remote access, recording, and automations vary by device, hub, region, and service plan. Check current requirements before buying.
Side-door security at a glance
| Door job | Start with | Add only when needed |
|---|---|---|
| Exterior utility entry | Direct contact sensor, sound local to the home, exterior light | Smart lock and camera covering the approach |
| Garage-to-yard door | Contact sensor, close/lock routine, power-failure plan | Driveway or side-yard camera |
| Shared or roommate entry | Named access, door-open alerts, account permissions | Time-limited codes and activity review |
| Rental property | Landlord approval, removable sensor, physical key backup | Retrofit lock that preserves the exterior hardware |
| Low-subscription setup | Functions that remain after a trial ends | Paid video history or monitored response |
Map the door before choosing devices
Inspect the frame, latch, hinges, weather seal, glass, deadbolt, Wi-Fi strength, nearby power, and camera sightline. A sensor cannot fix a door that bounces open. A smart lock cannot pull a misaligned bolt into place. Record whether the door opens inward or outward and whether local fire, egress, rental, or body-corporate rules limit changes.
Walk the route used at night. If the person at the door is hidden by a fence, bin enclosure, or parked vehicle, move the camera view instead of buying a higher-resolution camera for the wrong angle.
Use a direct contact sensor as the primary signal
A contact sensor answers the most important question: is the door open or closed? Lock state alone does not prove the door latched. Video motion can arrive late or miss an event. Mount the sensor so normal frame movement does not create false alerts, then test it from fully closed through the first few millimetres of opening.
Keep alerts selective. Useful rules include an opening during the household’s sleep window, a door left open for several minutes, or an opening when nobody expects a visitor. Avoid announcing every daytime trip; noisy systems train people to ignore the event that matters.
Add a smart lock for access, not for door detection
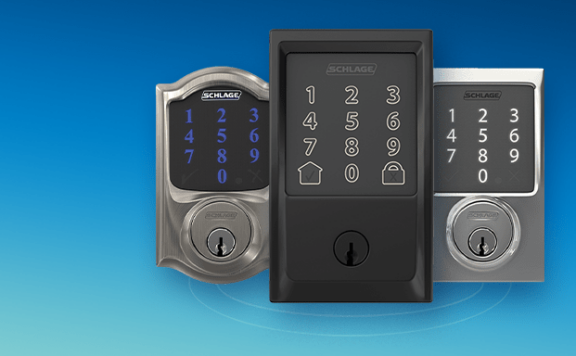
A smart lock earns its place when the side door is a real access route for family, cleaners, carers, contractors, or roommates. Use named or person-specific codes where the lock supports them. Remove access promptly after the job ends and keep an owner-controlled recovery method.
Check bolt alignment before installation. Test the lock with the door open, closed, under light pressure, and after temperature or humidity changes. Keep a physical key or documented local fallback. Renters should compare the fit and approval steps in the renter smart-lock guide; other homes can start with the side-door smart-lock guide.
Choose a camera only when video answers a question
A camera is useful when the household needs to identify a person, package, vehicle, or direction of travel. It does not replace the direct opening signal. Place it to cover the approach without recording a neighbour’s windows or a private indoor area. Use activity zones and conservative notifications, then test faces and clothing in daylight and at night.
Apple explains how compatible cameras work in the Home app and how recording options depend on the setup in its Home security camera guide. Compare broader choices in our HomeKit camera guide.
Build automations around safety and clarity
Good automations reduce uncertainty. Turn on a side-yard light after dark, notify if the door stays open, or include the entry in a bedtime check. Be cautious with any automation that unlocks a door or depends on location alone. A missed phone location, shared device, or stale presence state should not expose the home.
Keep the direct security event distinct from convenience routines. If an alarm layer is present, let its contact sensor and response plan own the security event. Let Apple Home handle compatible lights, scenes, cameras, and household notifications.
Home hub, network, and account checks
Remote control and automations may require a supported home hub and current software. Confirm device compatibility, radio range, and owner permissions before installation. Apple’s Matter accessory guidance is a useful starting point for current platform requirements, but a Matter logo does not guarantee every security feature appears in every app.
Use unique accounts, multifactor authentication where offered, and the smallest permission each person needs. Do not share the owner login. Document which household member owns the Apple Home, device-vendor, internet, and monitoring accounts.
Plan for internet, power, phone, and battery failures
- Internet outage: verify what still works locally and whether remote alerts stop.
- Power outage: test the hub, router, camera, alarm, and any network equipment on backup power.
- Phone unavailable: another adult must be able to lock the door, view the event, and respond.
- Low battery: record the battery type, warning path, replacement owner, and spare location.
- Account loss: keep recovery details and device-transfer steps somewhere the household can reach.
Compare the three-year cost
List the lock, contact sensor, camera, hub, network gear, installation, batteries, video plan, monitoring, and likely replacements. Separate one-time hardware from recurring services. Also record what disappears when a free trial ends. The lowest purchase price can become the more expensive path if it needs another hub, a paid recording tier, or an early replacement.
Where Abode can fit
A sensor-led system can give the side door a direct alarm event while Apple Home handles compatible controls. Start with the Abode Smart Security Kit and Mini Door/Window Sensor. Add Abode Lock or Abode Cam 2 only when access or video has a defined job. Review current functions and response options on the Abode plans page.
30-minute side-door acceptance test
- Open and close the door ten times; confirm every direct sensor event.
- Leave it ajar and verify the long-open alert.
- Lock and unlock locally, remotely, and with the physical fallback.
- Test each named user without sharing the owner account.
- Identify a face and package in daylight and at night.
- Disconnect the internet, then household power; write down what stops.
- Silence the owner’s phone and confirm another adult can respond.
- Remove a trial or paid feature from the worksheet and confirm the remaining system is acceptable.
Frequently asked questions
Does a HomeKit smart lock prove the side door is closed?
No. Lock state and door state are different. Use a direct contact sensor to confirm that the door is closed.
Do I need a camera at every side door?
No. Add video when identification or evidence changes the response. A contact sensor and good lighting may be enough for a low-risk approach.
Can Apple Home replace a monitored alarm?
Apple Home can coordinate compatible devices and notifications, but it should not be assumed to provide direct alarm dispatch or professional monitoring. Verify the alarm provider and plan separately.
What should renters test first?
Get written approval, confirm reversibility, test the physical key fallback, and make sure removing the device will not damage the door or frame.
Turn the side door into eight tested HomeKit security routes
A side entrance often carries more risk than its traffic suggests. Deliveries, bins, a driveway, a garage path, children, guests, and contractors may all use it, while the door remains outside the household’s main line of sight. Treat each security job as a separate route with an owner, a failure test, and a written response.
1. Prove the contact sensor’s true door state
Test fully open, nearly closed, closed but unlatched, latched, and door-held-open states. Compare the physical state with the Home app and the security app. If the app and door disagree, use the open-zone troubleshooting guide before building any automation around that signal.
2. Test the lock on the actual frame
Check hinges, weather pressure, strike alignment, manual deadbolt travel, auto-lock delay, and repeated cycles. The powered lock should not pull the door into place. Use the auto-unlock and auto-lock safety checklist to decide whether convenience rules are safe for this entrance.
3. Keep two independent recovery paths
A resident must be able to enter when the phone, account, network, keypad, or lock battery is unavailable. Assign a responsible person to the physical-key route and test the exact model’s documented emergency-power method. Record both in the lockout-recovery checklist and emergency-power test.
4. Separate HomeKit automation from alarm authority
A HomeKit scene may turn on a light, show a camera, or remind someone to lock the door. It should not become the only route for locking, arming, detecting entry, sounding a siren, or contacting help. Write down which app owns each action, who can change it, and what happens when the automation fails.
5. Test internet loss without confusing local and remote functions
Disconnect the internet and test the contact sensor, lock keypad, physical key, local siren, camera recording, Home hub, remote alerts, sharing, history, and export separately. Use the internet-outage test log. A HomeKit label does not prove that every function remains available offline.
6. Prove the siren and camera jobs
Trigger the side-door zone and confirm that the siren is recognized in bedrooms, working areas, the garden, and any detached space. Use the siren audibility test. Then verify camera view, timestamp, recording, retention, and lawful export with the HomeKit camera evidence-export checklist.
7. Audit every person and shared device
List residents, children, guests, cleaners, trades, property managers, emergency contacts, shared iPads, Apple TVs, Home hubs, phones, lock codes, alarm PINs, and camera viewers. Give each person only the authority needed. Remove old users from every connected account, then test that a removed code or account is denied.
8. Keep one incident record
If the door is left open, the lock jams, a code fails, an alert arrives late, or a clip is missing, record the physical state, app state, user, time, action, and evidence in one place. The incident timeline worksheet turns a vague complaint into a testable correction.
Run a 60-minute HomeKit side-door test
- Inspect and photograph the door, frame, latch, strike, lock, sensor, camera view, and nearby lighting.
- Test open, nearly closed, unlatched, latched, forced, and held-open states.
- Test manual lock travel, named codes, auto-lock, a removed code, low-battery warning, and emergency entry.
- Trigger the siren and camera, then verify recognition, timestamp, retention, and export.
- Disconnect the internet and repeat the essential local checks.
- Disable one automation and confirm that direct locking, detection, siren, and response routes remain intact.
- Review every user, shared device, Home hub, alarm permission, and camera permission.
- Log failures, assign an owner, and set a retest date.
Do not approve the side-door setup until these blockers are cleared
- The door can appear closed without latching or the deadbolt binds against the frame.
- HomeKit and the security app disagree about the door state.
- Entry or alarm control depends on one phone, one account, or one undocumented shared code.
- The physical-key or emergency-power route has not been tested.
- An automation is the only path for an essential security action.
- The household cannot state what works during an internet outage.
- The siren is not recognized or the camera cannot produce a usable lawful clip.
- Former users, codes, sessions, or shared devices retain access.